Building a Resophonic (Dobro Style) Guitar
A Pictorial Review
by Ken & Trisha Brooks
This was our first attempt at building a resophonic guitar.We thought you might enjoy the pictures and maybe learn from our experience.
This guitar had an incredible sound but we felt it could have used more bracing as it was made of thin solid woods. You will see, in the last two pictures, that extra bracing was added after the guitar suffered an accident which resulted in a cracked top.
Click any picture for a larger view

A solid spruce top cut to shape |
 Book matched rosewood back with exotic wood inlay |
 Bending a rosewood side |
 The bent side being made to conform to a mold |

Checking placement of soundwell and braces |
|
Setting the location of back braces.
|
Gluing the braces |
Finished back with braces |
A glue kerfing is added to
|
More kerfing being clamped
|


|
Fitting the kerfed soundwell
|
Here's a shot from another angle |
|
|
The neck block is glued in
|


|
In this shot,
|
Kerfing is added to
|
Kerfing gives more area
|
Checking the first side
|
Many clamps make
|


|
The glued side
|
Fitting the second side |
Glue and clamps
|
Cleaning out glue |
Sides, soundwell and end blocks
|


|
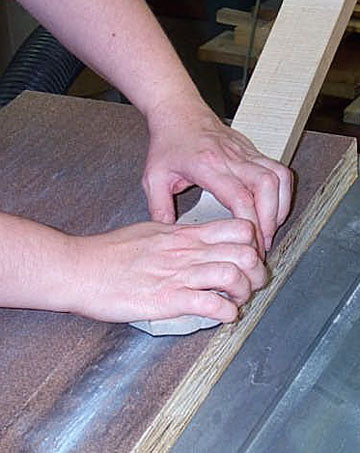
It took a lot of sanding
|
Attaching the top.
|
Cleaning out excess glue |
The wood inlay goes around
|
Another view in which you can
|


|
Using a Dremel
|
Here you can see the attachment
|
The binding is glued into the ledge
|
The pieces of strapping tape
|
After routing
|


|
Now we just wait for the glue to dry |
The binding needs to be
|
A cabinet scraper works well for this job |
For visual clarity,
|
The fretboard is routed to receive the inlays |


|
Trisha will use a
|
She then epoxies the pieces into their holes
|
After the epoxy dries,
|
Not Yet. Still more sanding needed |
The finished inlay work on the fretboard |


|
Setting fret wires |
Pressing frets into
|
Binding is then added
|
Trisha cuts the
|
Here, she is painting
|


|
It's scary business
|
Does a nice piece of
|
Check many times
|
There, that wasn't too bad |
Trisha works some magic
|


|
The router base attachment
|
Now she messed it up
|
Black epoxy is used
|
A heat lamp is used
|
Ugh, yech! |


|
She says
|
I don't
|
Back to the
|
I knew she
|
This is the jig used
|


|
Checking to see if
|
Using the a fine adjuster
|
After some finish work
|
Here is the finished project
|
....and the back |


After the Accident (guitar dropped on endpin)
|
2 carbon fiber rods and an extra tail block were added for longitudinal strength. (holes in the soundwell needed to be widened) After the epoxy set, the rods were plucked and gave off a G# pitch. That couldn't be good........... |
...so, posts were added to break up the ringing length of the rods which adds more support to the back. |

